
In Software Development
In this tutorial we will create a Telegram bot to track your personal Cryptocurrency portfolio on Binance

Management

In this tutorial we will create a Telegram bot for your personal needs that can do the following:
- Show current asset size in USD(T).
- Show changes in the portfolio in USD(T) per week and over time.
It is critical that I don't use any "all exchanges in one place" kind of app as a proxy - yes, I don't want to give my keys to anyone.
If you need one, let's write one.
What will we need?
We will use cryptocurrency exchange Binance as an example in this article. It's worth noting that there are no restrictions on using it with other exchanges - the whole framework is the same. Except that API interaction will be a little bit different (it depends on exchange).
- We will need the functionality of Telegram (where without it).
- We'll need Dropbox instead of a database (oh, yes).
- We will need a tool to run our bot, I personally use Heroku, but you can use AWS.
Creating a bot in Telegram
This step has been described hundreds of times in a huge number of articles, which are easy to find. So here will be brief.
We need to find the @BotFather contact in Telegram and run the sequence of commands
/start
/newbot

# We need to enter the new bot's private name and its public name
# I'll use the unpopular public name because that's where our finances will be
# Here we get the API token of our bot and save it
# Remember the link like t.me/alias_binance_bot
Base
First, we'll prepare Dropbox.
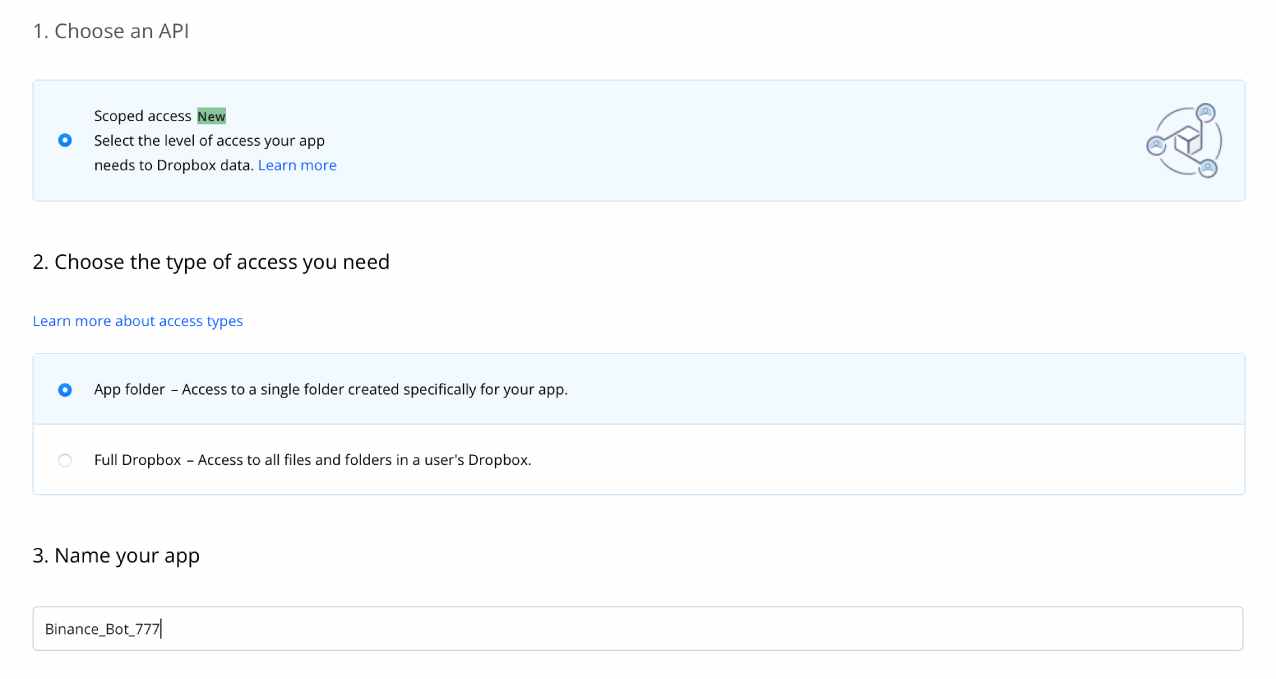
We'll follow the link and get our API token for Dropbox by clicking on the Create App button. I'll create access to a separate folder in Dropbox.
Business process transformation
On the current page we will need to generate an OAuth 2.0 for Dropbox:
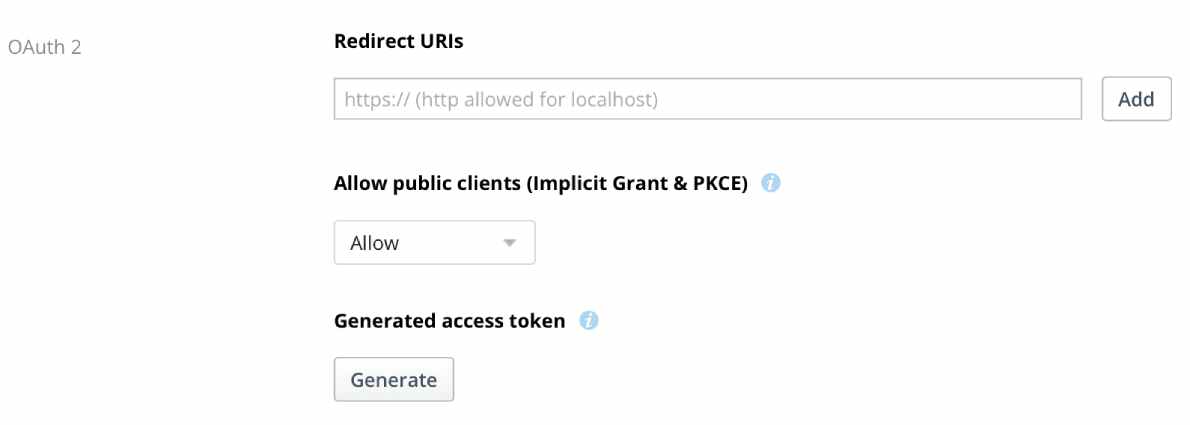
Once created, let's go to the Permissions tab and set permissions on files.content.write
Now at the link we have the APPS folder. Go into it, then go into the subdirectory with the name of our bot. There we need to put the file totalData.txt, which contains only an empty list.
[]
Interaction with Binance
We need to create our API key on the Binance exchange.
This activity follows this link.
The result of this activity for us will be API Key and Secret Key. In our case, the read-only permission will be enough.

As the next step we will write the code which we will use further on.
import json
import time
import logging
import os
import binance
import dropbox
from binance.client import Client

logging.basicConfig(format='%(asctime)s - %(name)s - %(levelname)s - %(message)s',
                    level=logging.INFO)

logger = logging.getLogger(__name__)

binanceKey = ['BinanceKey']
binanceSecret = ['BinanceSecret']

dropboxToken = 'DropboxKey'

SLEEP_TIMEOUT = 1 * 60

def getBalance(idx):
    client = Client(binanceKey[idx], binanceSecret[idx])
    balances = client.get_account()['balances']
    balanceUsd = 0
    prices = client.get_all_tickers()
    for b in balances:
        curB = float(b['free']) + float(b['locked'])
        asset = b['asset']
        if curB < 0.000001:
            continue
        if asset == "USDT":
            balanceUsd += curB
        prices = sorted(prices, key=lambda p: p['symbol'])
        for p in prices:
            if p['symbol'] == str(asset) + "USDT":
                balanceUsd += float(curB) * float(p['price'])
    balanceUsd = float("%.2f" % balanceUsd)
    curt = time.time()
    return balanceUsd, curt

def getAccountInfo():
        amountUsd, timenow = getBalance(0)
        return {'usd': amountUsd, 'ts': timenow}

def loadJsonFromDropbox(dbx):
    for i in range(1):
        try:
            meta, resp = dbx.files_download('/totalData.txt')
            print(meta, resp)
            body = resp.content.decode('utf-8')
            resp.close()
            return json.loads(body)
        except Exception as ex:
            time.sleep(0.5 * (2 ** i))
            print(ex)

def saveJsonToDropbox(dbx, content):
    jsonBytes = json.dumps(content, indent=4).encode('utf-8')
    dbx.files_upload(jsonBytes, '/totalData.txt', mode=dropbox.files.WriteMode('overwrite'))

def addInfoPointToDropbox(dbx):
        content = loadJsonFromDropbox(dbx)
        content += [getAccountInfo()]
        saveJsonToDropbox(dbx, content)

def main():
    dbx = dropbox.Dropbox(dropboxToken)
    while True:
        addInfoPointToDropbox(dbx)
        time.sleep(SLEEP_TIMEOUT)
    amountUsd, timenow = getBalance(0)
    print(amountUsd)
    print(timenow)

if __name__ == '__main__':
  main()
First, let's try to run this code locally. If everything is done correctly - the code will be executed every 60 seconds and after some time the file totalData.txt should look like this
[
    {
        "usd": 2.81,
        "ts": 1670699696.930476
    },
    {
        "usd": 2.82,
        "ts": 1670699760.437554
    },
    {
        "usd": 2.84,
        "ts": 1670699823.819883
    },
    {
        "usd": 2.86,
        "ts": 1670700537.611635
    },
    {
        "usd": 2.88,
        "ts": 1670700600.6501918
    }
]
Some more code. How to read diff
As I wrote above, I am using Heroku. In addition, until recently, this service was free, but times are changing and you may wonder whether you should use Heroku or swear by AWS. If you decide to use Heroku, I can recommend this article.
The bot itself will have one key command - stats.
API keys from Binance will not be needed here. Only the token obtained when registering the bot in Telegram and the Dropbox token (remember, Dropbox replaces our database?). To calculate the information for a week, we simply generate a list of balances for the week. If necessary, it's easy to change the code and count diffs for any time slice.
import logging
from telegram.ext import Updater, CommandHandler, MessageHandler, Filters
import os
import dropbox
import time
import json
import datetime

PORT = int(os.environ.get('PORT', 5000))

# Enable logging
logging.basicConfig(format='%(asctime)s - %(name)s - %(levelname)s - %(message)s',
                    level=logging.INFO)

logger = logging.getLogger(__name__)
TOKEN = os.environ.get('TELEGRAM_TOKEN', None)

dropboxToken = ''

def start(update, context):
    update.message.reply_text('Hi!')

def loadJsonFromDropbox(dbx):
  meta, resp = dbx.files_download('/totalData.txt')
  body = resp.content.decode('utf-8')
  resp.close()
  return json.loads(body)

def getHistory():
  dbx = dropbox.Dropbox(dropboxToken)
  prices = loadJsonFromDropbox(dbx)

  timeNow = time.time()
  dtNow = datetime.datetime.now()
  dtToday = dtNow.replace(hour=0, minute=0, second=1)
  dtWeek = dtToday - datetime.timedelta(days=dtToday.weekday())
  dtAllTime = dtNow - datetime.timedelta(days=100000)

  stats = {
    'this week': {
      'since': dtWeek.timestamp(),
      'till': dtNow.timestamp(),
      'prices': []
    },
    'all time': {
      'since': dtAllTime.timestamp(),
      'till': dtNow.timestamp(),
      'prices': []
    }
  }

  for item in prices:
    for stat in stats:
      if stats[stat]['since'] < item['ts'] < stats[stat]['till']:
        stats[stat]['prices'].append(item)

  text = ''
  totalBalance = 0.
  totalBalanceUsd = 0.
  for stat in stats:
    usdt = [p['usd'] for p in stats[stat]['prices']]

    if len(usdt) >= 1:
      u1 = usdt[-1]
      u2 = usdt[0]
      valueUsd = '{:+.2f} USD'.format(u1 - u2)
    else:
        values = 'n/a'
    text += '{}: {}n'.format(stat, valueUsd)
    if stat == 'all time':
      totalBalanceUsd = u1

  dt = datetime.datetime.fromtimestamp(prices[-1]['ts'])
  text += 'nLast update: {:%A %H:%M:%S} UTC+0n'.format(dt)

  return update.message.reply_text(text, parse_mode='markdown')

def main():
    updater = Updater(TOKEN, use_context=True)
    dp = updater.dispatcher

    dp.add_handler(CommandHandler("start", start))
    dp.add_handler(CommandHandler("stats", getHistory))
    dp.add_handler(MessageHandler(Filters.text, echo))
    dp.add_error_handler(error)

    updater.start_webhook(listen="0.0.0.0", port=int(PORT), url_path=TOKEN)
    print(TOKEN + ' <- TOKEN | ' + str(PORT) + ' <- PORT')
    updater.bot.setWebhook('https://your_heroku_app.com/' + TOKEN)

    updater.idle()

if __name__ == '__main__':
    main()
In lieu of a conclusion.
As a result of applying the stats command, you should get e.g. the following message in response:
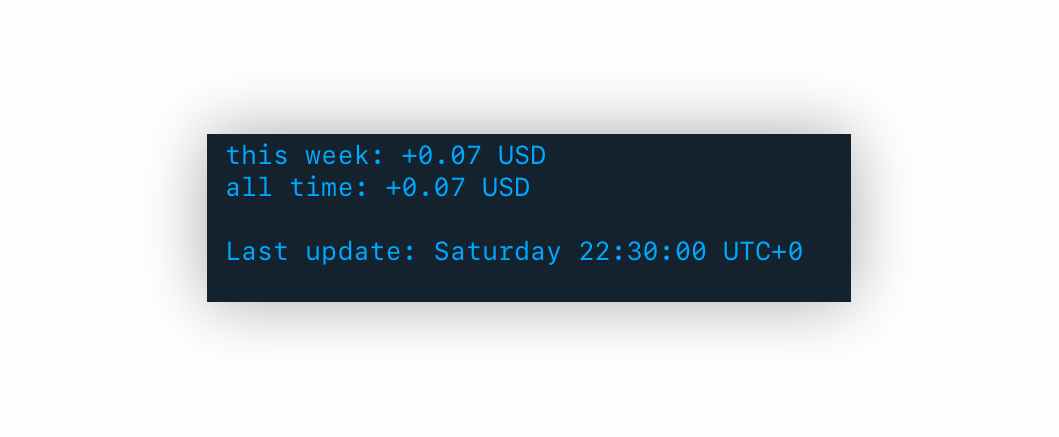
It is worth noting that this bot can be further developed into even more applications.
For example, you can implement a buy or sell command. You can connect additional accounts or multiple exchanges and monitor all of your portfolios in one place. Convenient? Yes, it is!
To connect additional accounts, just add another call in this place (and of course additional api keys - there they are already in the list).
amountUsd, timenow = getBalance(1)
However, we'll leave these exercises for dear readers to work on their own. But everyone has different needs ? .
In general, all sources are already presented in the article, but just in case - they are also on GitHub.