
In IoT Development
DIY Smart Light with Tuya Socket board, Arduino, Tuya Smart IoT Platform. - read the full article about IoT Development, IoT Development and Internet of Things technologies from Electronics Innovation on Qualified.One

Youtube Blogger
Hello All, I am Veeru from electronicsinnovation.com, I am your host for this episode.
In my previous videos, I have clearly explained how to get started with the tuya IoT platform and deploy the different projects on the same platform.
In this video, We will see how to integrate Tuyas socket sandwich board with Arduino Uno, and control any home appliances which are based on 230V Alternating current.
for example, we will see how to control a LED Bulb here.
So, lets see how we can do that.
First of all, visit the Tuya IoT platform using the link provided in the description below.
Signup by providing the following info and then confirm your email.
If you register on the tuya IoT platform using the link I have provided in the description box, you can get tuya network modules for free worth $7.5.
Then login to the platform using the same credentials.
If you find the website in the Chinese language, you can change it to English from here.
These are the previous projects we have done, If you wish to go through them, you can find the playlist on the top right corner.
Click on the create a product, go to the lighting category and select the light source.
select solution type, custom solution.
then click on Light source.
Provide a name for your device, if you wish you can also provide a model for it.
then check protocol WiFi-Bluetooth and power type standard power consumption, after that click on create button.
these are the default functions for a standard light source, if you want, you can select or deselect the functions based on the requirement.
for now, I am not changing anything and continuing with the default options.
then click on okay.
Thats it a new product/ device has been created on the tuya IoT platform.
Now, copy the product id and mail it to [email protected] together with your Tuya IoT account name as the subject.
After some time, you will receive a token from the Tuya DevOps team.
Then, visit the tuya PMS platform using the link provided in the description.
signup by providing all required details, then log in using the same credentials.
If you find the website in the Chinese language, you can change it to English from here.
Click on Production management, work order management, then activation code verification.
Input Token ID that you just receive over mail and confirm.
Please note that the One Token ID can only be activated by one user.
You can find the activated code list in the following menu.
Thats it.
The token was activated successfully.
We will use the TYDA software application to burn the authorization into the ESP8266 module.
I have explained how to download and install and set up this software in the previous video, you can watch that video using the above I button.
After successful login, the following page should appear.
If you find the software in the Chinese language, you can change it to English from here.
Then, select the setup option from the file menu. select the burning baud rate 921600 and testing baud rate 9600 and leave the rest of the configurations as default.
then click on the ok button.
Click Enter Token to input the token which is activated on the tuya PMS platform and select workstation-Burning Authorization, also check the firmware download option.
then click on okay.
Now, connect ESP8266 to your PC using any USB interface.
select the com port and click on the run button.
after a few seconds the burning procedure will begin and continue until 100%, then you will see the following success page on the software.
If the following success page appeared on the software, congratulations... you have successfully burned tuya authorizations into the ESP8266 module.
After burning authorizations, disconnect esp8266.
Here is the circuit diagram to interface the ESP8266 module, Tuya socket sandwich board with Arduino.
The Arduino UNO will read instructions from the tuya IoT platform using esp8266 and execute them using the tuya socket sandwich board.
First, I have stacked the tuya socket sandwich board on Arduino UNO as shown here.
Then soldered the rest of the 4 wires required for nodemcu and then connected.
Now open ArduinoIDE.
We are going to use the Tuya library "Tuya_WiFi_MCU_SDK" for this project.
this library can be installed from the Arduino library manager.
Now, go to the examples section from the file menu and search for Tuya_WiFi_MCU_SDK, and open the start example.
This is the code we are going to use to control home appliances over the tuya smart IoT platform.
before uploading this code to Arduino UNO we need to make some changes in this sketch in order to work with the tuya socket board.
as you can see here the led port is initialized and it is connected to the "BUILTINLED" pin.
We all know that BUILTINLED is connected to GPIO13.
but if we look at the Tuya socket sandwich board it is different.
These are the two modules, we are using, for comparing I have placed the boards side by side in the same way they will get stack on each other.
If you observe closely.
the pin of the relay is getting stacked with GPIO 10, not with the GPIO13.
so, we need to change the pin initialization and everywhere.
Just search for LED_BUILTIN in the Arduino IDE and Replace it with 10, thats it.
Now the code is ready to upload to the Arduino Uno.
Now Connect Arduino Uno with PC Then check uploading configurations board Arduino Uno, and select the right port.
then compile the code and upload it to the Arduino UNO After successful uploading, connect the GPIO pin 7 of the Arduino to the ground for 3 to 4 seconds to put the device into pairing mode.
The onboard led will flicker if the module is in pairing mode, you can also listen to the tick tock sound while the relay module is flickering.
Now take out your mobile and open the tuya smart app and add the device as shown here.
Select light source from the lighting category, confirm the indicator is blinking rapidly, provide the available wifi credentials, then click on next.
boooooooooom.
the device has been added to the Tuya smart IoT app successfully.
if you want you can edit the device name here, then click on done.
Upon successful pairing, the device will appear on the home page.
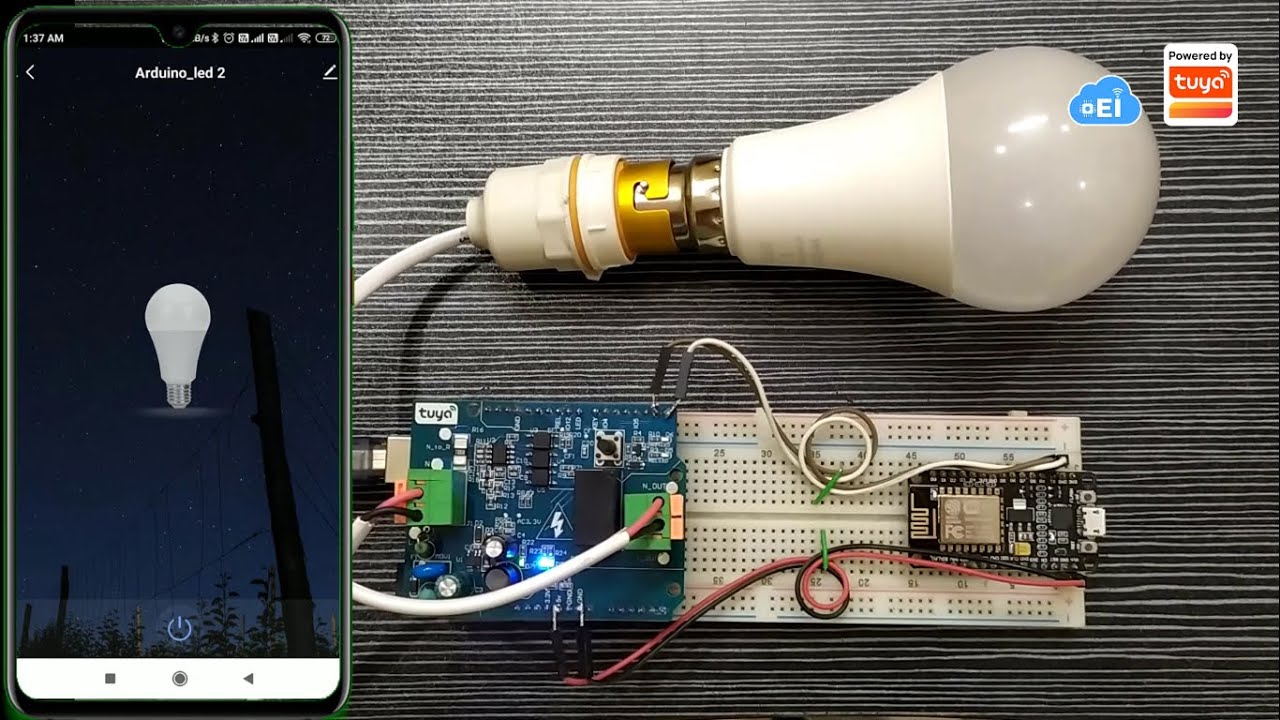
If you click on the device you can see the on-off button on the bottom of the screen.
we can control the home appliances connected to the socket board from here.
Now, I have connected a general home appliance that present in every home at the output of the socket board and provided a 230V input connection at the input port.
So, everything is set and now we can control this bulb seamlessly.
The bulb turned on.... turned off...turned on.... turned off...turned on.... turned off...turned on.... turned off...
Likewise, we can control the 230v LED bulb seamlessly from the tuya smart IoT platform.
Not only led bulb we can control any home appliances which have a load below 10A can be controlled using this Socket board.
Examples are Fans, geysers, Fridge, Kettle, Television, printer, Hairdryer, Washing machine, Dishwasher, toaster, iron, Microwave, Wi-Fi router, and a lot more which are under 10Amps load.
Thats it for the tutorial.
I hope you have enjoyed the video and learned something new from this episode.
stay tuned to electronics innovation for more videos on the Tuya Smart IoT platform...see you soon on the next video.
bubye...
Electronics Innovation: DIY Smart Light with Tuya Socket board, Arduino, Tuya Smart IoT Platform. - IoT Development