
In Mobile App Development
Note App Core Data Swift Xcode Tutorial - read the full article about app development tutorial, Mobile App Development and Native and cross-platform solutions from Code With Cal on Qualified.One

Youtube Blogger
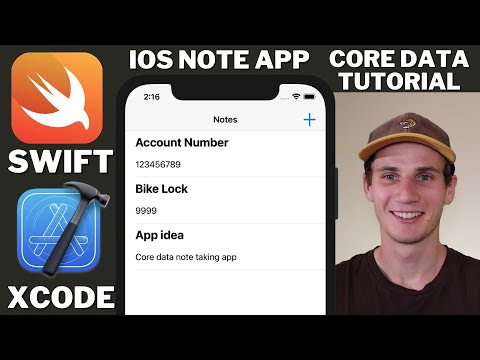
hello and welcome to another swift and xcode tutorial my names cal and in todays tutorial were going to be building a very simple note-taking app our note-taking app is going to use core data so were going to make all of our data persistent so that when the user closes the app and they come back in and their note that they took in the previous session or in their before they closed it all that data is going to persist and be there when they want to use it so a more real-world application rather than just building a note-taking app um and the ui side were going to be doing a little bit more of the back-end sort of thing so theres a lot of good content its a bit of a longer video the first part were just going to get a simple adding a note to a list and then in the middle part were going to make it so that you can edit a note and the final part were going to make it so that you can also delete a note new xcode project this is an ios app so just selecting app im going to call it note app core data were just going to make sure that we select core data here and our programming language is swift as always first thing were going to do is head into the main storyboard and organize our layout drag in a navigation controller and then just move the storyboard entry point to the navigation controller im going to rename the title here to notes and zoom in a little bit so we can actually see whats going on and then im going to drag in a button into the navigation bar im going to change the text to nothing and make the background this plus symbol you can see its a bit wide there so im just going to adjust the width so its a nice square with our button im going to create a segue way and im going to say present modally to our view controller that we already had next what were going to do is select on the table view and im going to make the row height not automatic im going to give it a fixed width of 90 drag in a label onto our table view cell and im going to copy and paste that down so weve got two labels one on top of the other give it some constraints so that it sits at the top and left of our table view cell space trailing space and leading space and just adjusting those numbers just want to make sure that the trailing space is greater than or equal to with the bottom one equal widths as well as center horizontally both of those constraints are relative to the top label were going to give our top label a height as well as bottom space just changing the multiplier there to one vertical spacing from the bottom one were going to allow to have two lines because its going to be a slightly longer bit of text and just setting the text alignment to the left and then im going to make the top one bold as well as make the font size a little bit bigger and im going to call this title and description next what were going to do is our layout for our detail view controller im just going to drag in a text field im also going to drag in a text view and then im going to drag in two labels so the first one ive just dragged in and then ive copy and pasted the second one and im just going to give it some constraints so center it in the container as well as a little bit of space to the top and rename that to title and the other one to description im going to center the text field off the title as well as giving it equal width to the safe area and then just setting the multiplier to 0.75 so the text view is going to take up 75 of the width do the same thing pretty much for the text view centering it off our description label as well as giving it a height because the text view needs height as well and yeah so you can see weve just got a pretty simple sort of form weve got the text field of the title at the top and the text view of the description below next what were going to do is just change the background color to a nice light gray so that the textview stands out a little bit and then just remove that lorem ipsum cool and next what were going to do is create a couple of files file new swift file im calling the first one node cell hitting command and n new swift file im going to call this one note table view and next were going to rename our view controller were just going to call that note detail vc change the class name and a little bit of tidying up in our note cell file were just going to import the ui kit the note cell class is of type ui table view cell and same thing in the note table view import the ui kit note table view is of type ui table view controller nice so we can head back into the main storyboard and rename the class of all of our components to the correct class so table view for the table view cell for the cell so linking all of our storyboard components with their corresponding swift class i actually changed my mind on our present modally i think i want to keep the navigation bar so im just going to change this to show and you can see now weve got the navigation bar and the reason i want the navigation bar is i think its going to look nicer to put the save button up in the top right corner so thats what ive done there ive just dragged in a button and renamed that to save you open up the assistant editor and im going to create an action for our save button im just calling it save action and then im going to create outlet for both of our textview and our text field so just calling the first one title text field and the next one description text view were going to head over into our note cell and just create the outlets over there so title label and description label and we can close off our system editor now and were actually going to create our entity so ive just headed into our note app core data file and im going to hit new entity or add entity and im going to rename our entity to note add an attribute of id this is going to be an integer add in two strings which so title and description as well as one boolean which is deleted open up our left side panel code gen manual or none and that just means that were going to create our own swift file and manage the entity of our note manually so yeah ive just created another swift file called it note and then were going to import the core data its of type object note so an objective c note and then the class is note of type nsmanaged object and then create an nsmanaged variable called id which is an nsnumber so that integer variable we created earlier and then im going to create two strings title and description as well as i actually changed my mind im going to make this one deleted date rather than just a boolean so were going to store the timestamp for when the note is deleted and then just heading back into the note app core data and changing that from boolean to date so were going to head into our note table view swift file and im going to declare an array of notes so our object that we just created override the cell for row at index path method and just declare our cell so im going to say let note cell is equal to table view dot dequeue reusable cell with identifier an identifier of note cell id casting it so as note cell so our note cell switch file return that note cell and before we go any further im just going to copy and paste that identifier head into the main storyboard and click on our note cell open up the side pane and we just want to add it in here identifier so note cell id so those two strings have to match for the cell to be identified and then were just going to head back into that and declare a note so this note of type note this note is equal to get the current row out of the table view note list and index path dot row and then were going to say notecell.titlelabel.txt is equal to this note.title and same thing for description cool so next we need to override the number of rows in section method so im just typing number of rows in section and then overriding that function and were just going to return note list dot count and i forgot to say for index path here at our note cell so just putting that in now and were actually going to make this note list a public variable so it can be accessed from other classes were actually going to access it from the note detail view controller yeah just heading into that class now im going to import core data and then in our save action were going to say let app delegate equal to ui application dot share delegate as app delegate so thats our little appdelegate.swift file that context of type nsmanaged object context equal to appdelegate.persistentcontainer.viewcontext so we now have the context for which we want to save our entity next were going to create an entity so im just going to say let entity equal to nsentity description entity for name and were going to give it note so our entitys name is note so that has to be correct and case sensitive i believe and then were going to give it context which we just got and then were going to say let new note equal to note and were going to give it an entity which is our entity we just created and then insert it into our context new note id is equal to note list count as nsnumber this should be an auto incrementing id and newnote.title is equal to title textfield.txt and new note description is equal to description textview.txt nice and then we just need to call context.save so save our editing context and we actually have to put this in a do catch statement so do try and catch if it happens to fail im just going to print out a quick message context save error and then after we save our context so we save our new note im just going to append it to our memory note list as well as pop our view controller so just go back to the previous view controller now inside our previous view controller which is our notetableview.swift file were just going to override the view did appear method and just call tableview.reloaddata nice and if we quickly build and run this you can see we can add a new note give it a title and a description and if we hit save its popping up in our list and well do that again so were just going to say bike lock and give it four nines however if we want to make the data persistent we actually have to load from our core data back into our memory note list so inside of our note table view controller im going to import core data create a variable called first load and its equal to true if on first load first load is equal to true set it to false so were just going to run that once and then head into our note detail vc and just copy those two lines and then below were going to say let request equal to ns fetch request of type ns fetch request result and were going to give it our entity name so note with a capital n create another do catch statement and were going to say let results type ns array equal to try context dot fetch request as ns array inside our catchment statement just print out fetch failed and then were going to go through our list of results so were going to say for result in results let note equal to result as note so just casting our result to our node and then were going to say note list dot append note cool and if you build and run this again you can see that those two notes have been loaded from the database and into our memory and then therefore into our note list app and the next thing were going to do is create an edit so that when you click on one of the cells it takes you back into our note detail view controller and then you can then edit the note and save it cool so just heading into the main storyboard im going to click on our current segue way and just give it a name so an identifier and then im going to create a new segue from our note view controller to our detail and im going to call this one edit note and then im going to copy that and just rename this title to note details and head back into our note table view swift file we want to override the did select row at function and then were just going to call self.perform segue with that identifier that we just copied so edit note and the sender itself override the prepare for segue method and were just going to say if the segue identifier is equal to our edit note segue say let index path equal to table view dot index path for selected row and then say let note detail is equal to segue dot destination as note detail vc lets select a note of type note selected note is equal to get our note out of our note list at the position heading into our note detail view controller we just want to declare a variable called selected note which is optional and its defaults to nil and then were just going to say note detail dot selected note is equal to selected note so pass the selected note from our table view into our detail view controller and then say table view dot deselect row at index path and set animated to true back inside our detail view controller were just going to say in our view did load if selected note is not equal to nil title.textfield.txt is equal to selected note title and the same thing for description so were just putting if theres already been a note title or description were just putting that back into the textview and the text field and then in our save action were just going to say if selected note is equal to nil meaning its a new note do what weve already been doing otherwise were going to be editing a note for this we want to copy most of what weve done in the table view controller and stick that in here in our else statement and instead of note list dot append note were going to say if the note weve gotten is equal to selected note note.title is equal to textfield.txt and same thing for the description save the context and pop the navigation controller again and you can see now weve got an edit working so i can go in and manage the title as well i can still create a new note the next thing to our core data and note taking app is a delete button so ive just headed into the main storyboard and ive put in a delete button just below our description text view changing the title to delete gonna make the color red as well make the text a little bit bigger and making it all capital as well as making the text bold im also going to change our save button just make that a little bit bigger i feel like i could have done that earlier but anyway here we are doing it now and then im going to open up the assistant editor just to create an outlet for our delete button so right click and drag below and create an action im just calling our action delete note and then im going to head into our note detail view controller and inside that im just going to copy down what weve done our two main lines so app delegate and our context line as well as our request line from our edit and were just going to say instead im going to say no dot deleted date is equal to new date inside our table view were just going to create a function were going to call it non-deleted nodes its going to return an array of nodes were going to create another note array at the top of the function and were just going to say for note in note list if the deleted date is nil were going to append our note to our non-deleted note list and then just return that list and then we just need to go through our table view controller anywhere that it says note list we need to replace it with non-deleted notes or at least anywhere that the user is going to see it were going to replace it yeah if we go and run this one last time im just going to create a note calling it note to delete and if we delete that you can see its gone from the view so this has been a simple note app using swift and xcode and a very basic core data tutorial we learned how to edit persistent core data we learned how to add new persistent core data and as well delete well at least set a flag deleted in core data so i hope you enjoyed the tutorial and ill catch you guys in the next video
Code With Cal: Note App Core Data Swift Xcode Tutorial - Mobile App Development