
In Mobile App Development
Calendar App Example Swift Xcode Tutorial - read the full article about app development tutorial, Mobile App Development and Native and cross-platform solutions from Code With Cal on Qualified.One

Youtube Blogger
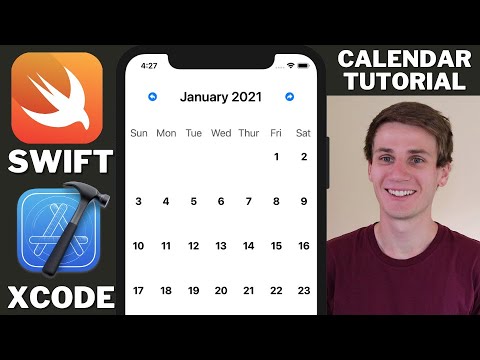
hello and welcome to another swift an xcode tutorial my name is cal and in todays tutorial were going to be building a very simple calendar view in the first part of the tutorial were just going to get the layout sorted were going to use buttons and stack views as well as component view to create the actual days of the calendar were going to create a calendar helper file with some basic calendar methods that hopefully are reusable that we can use throughout our app just to make the calendar a little bit easier to work with and then yeah in the final part were just going to tie it all together creating a new xcode project this is an app im going to call it calendar example tutorial storyboard ui kit and swift is our programming language and then were just going to head into the main storyboard im going to drag in a label at the top and just center it in the middle and give it a little bit of space to the top this label is going to display our calendars month and year so im just making that a little bit bigger and bold and then im going to drag in two buttons the first one im just going to say horizontal spacing to the label as well as trailing space to the edge im going to center it vertically off our label leading space zero and align space zero just gonna remove the button title and add in an image im just typing in right and im gonna select arrow shape turn right system default image so it should be available to you but its not really important what the button is its just one that i like the look of so just doing the same thing on the other side centering the button vertically off the label making sure all of those constraints are zero so weve just got one nice label in the middle and then two buttons on either side flipping the arrows so weve got a left turn arrow and a right turn arrow proportional height equal to one so the buttons are the exact same height as the calendar month label and then were going to drag in a stack view so make sure this is a horizontal stack view sit that just below our month and year label is going to contain the day of the week so monday tuesday wednesday thursday etc basically giving it trailing space and leading space to the edge center it horizontally in the safe area as well as giving it a height and top space to the label and once we adjust all of those constraints should just be sitting just below our month label and buttons and so inside our stack view im just going to drag in a label adjusting the text to be sunday im going to make the text a little bigger as well as making it a line in the center im going to change the color to dark gray and then im just going to copy and paste that six more times for each day of the week so monday tuesday wednesday thursday friday saturday sunday cool and then with our stack view we just need to make it so that it fills equally so each one of the days of the week is exact takes up the exact same amount of space horizontally its under stack view distribution fill equally final component for our calendar tutorial example is a collection view so im just dragging that in im going to give a vertical spacing to the stack view as well as bottom trailing and leading space to the container setting all of those constraints to zero so that basically the collection view takes up the rest of the available space and then im just going to drag a label onto our collection view cell and im going to center it horizontally and vertically in the container and then just change the multiplier of vertical constraint to be 0.5 just so it sits a little bit higher in the cell and then im going to adjust the size and the font im going to make it bold so were going to create the file for our calendar cell so were just saying file new swift file and im going to call it calendar cell a class calendar cell which is of type you i just need to import the uikit ui collection view cell and then if we click onto our collection view cell and we head into here and we say class calendar cell it should be linked up now so weve linked the swift file with the storyboard cell and next were just going to open up the assistant editor and im just going to create an outlet for the collection view as well as our month label were going to create two button actions next and previous month so just right click and drag calling this one previous month and doing the same thing calling it next month and then were going to head into our calendar cell and for some reason it wasnt working for me with the assistant editor ive just pasted in a outlet for a label and then now i can select it in the assistant editor and link up our label with our cells label cool so thats most of our calendars layout finished so we can close up the assistant editor and head into our view controller . swift file and im just going to do a quick bit of tidying up getting rid of the comments and then the first thing im going to do is declare a variable im going to call it selected date which is equal to date which is just putting todays date into that variable and then were going to create another variable were going to call it total squares which is a array of strings and then were going to create a function calling it set cells view and were going to call that from view did load and inside here were just going to say let with equal to collection view . for dot width minus 2 so thats our padding divided by 8. so we get 8 because there are 7 days in a week and then we just need to add one and 2 is a bit of an arbitrary number but its the spacing around each of the cells so were just going to copy and paste down that line and changing the variable name as well as the frame size to height were going to leave the padding as two and were going to keep it as divided by eight so were going to have seven rows were never going to fill the bottom one you could change that to seven if you wanted the calendar to take up a bit more of the screen let flow layout equal to collection view dot collection view layout as collection view flow layout and then say flow layout item size is equal to new cg size and give it our width and our height next we want to get our calendar collection view linked with our view controller so im just going to head right up to the top im going to put in a comma and then im going to type ui collection view delegate and then another comma and ui collection view data source and then its going to give us an error message saying we need to implement those functions so im just going to hit fix and implement the protocol stubs for the number of items in section method were just going to return total squares dot count or the cell for item at method were going to say let cell equal to collection view dot dequeue reusable cell with reuse identify so you just couldnt put whatever you like in here so ive called it cal cell for index path as calendar cell which is our class that we created earlier and im going to say cell dot day of month dot text is equal to total squares get the string out of our total squares array at index path dot item and then just return the cell were going to copy the cal cell or whatever you used as a reuse identifier and head into the main storyboard click on the cell and put it in as an identifier so those two strings have to match for it to link up correctly and then im just going to right click from our collection view onto our view controller and assign it to be a delegate and a data source and you can check by just right clicking on your collection view nice one so next what were going to do is create another swift file and im going to call this calendar helper . swift and basically this is just going to be somewhere to put all of our various calendar methods im just defining a new class somewhere to put all these methods im calling it calendar helper and the first thing im going to do is declare a variable called calendar and its just going to be equal to calendar . current and then im going to create another function below that its going to be plus month its going to take a date and return a date and were just going to say calendar . date by adding month to day the value of one then any day at exactly one month so given a date in january itll return a date in february and given a date in february itll return a date in march and we just need to make that non-optional and then were going to copy and paste that down and just renaming the method to minus month and changing the value to -1 so just the same thing in reverse the next method were going to create is called month string and its also going to take a date and its going to return a string though and all we need to do in here is just say let date formatter equal to date formatter and were going to set the date format LLLL and so this is just going to return a month in text and then return date format dot string from date copy and paste that method down for year and just change the date formatter to yyyy and thats going to return just the year as a number so the next method were going to create is called days in month and its just going to return the number of days in any given month so for example january has 31 days whereas april has 30 days given a date in january its going to return 31 where as if its given a date in april it will return 30. so were just going to say range is equal to calendar . range of day in month for date and then just return range . count our next calendar method is day of month so just take the day component out of any given month so just going to say calendar . date components day from date and then return components.day given the 2nd of january 2020 it will just return two the next method is first of month its going to have the same parameters but rather than pulling out the day were actually going to pull out the year and month and thats going to give us the first of so given the 15th of january our first a month function is going to return the first of january cool and the next function were going to create were going to call it weekday so ive just copy and pasted from the day of month function and im just going to change that to weekday and weekday and then were actually going to minus one cool and that should be all of our basic functions created in our calendar helper swift file so heading back into our main view controller were going to create a new function calling it set month view and first thing were going to do is just remove all from our total squares string array and then were going to define a days in month variable and were just going to call our calendar helper and get our days in month from our selected date so remember that selected date was just initialized to todays date and then were going to say let first day of month equal to calendar help the first day of month and giving it our selected date as well and then were going to say let starting spaces equal to calendar helper weekday giving it the first of the month next were going to declare a variable called count and just initialize it to 1. and then were going to say while count is less than 42 and 42 is the number of squares were going to populate so 31 days is the maximum in a month but first of the month falls on a saturday were going to need at least six rows or to fill in all the days and obviously six times seven is 42. and then were just going to say if count is less than or equal to starting spaces so how many blank spaces before the first of the month or count minus starting spaces is greater than days in month however many squares are left over to fill in our sixth row they append a empty string otherwise were going to append string value of count minus starting spaces so move along say six places and then put in one two three four five six seven eight until we get to the end of the month and then start putting in blank spaces again to fill in six rows then were just going to say count plus equal to one and we need to call this function from our view did load just so that we put in the initial month on load and then were also going to put it in previous month but before we do that were going to say selected date is equal to calendar helper dot minus a month from selected date and then call set month view and we just need to do the exact same thing for next month but just calling plus month instead of minus month really quick im just going to override the should auto rotate and im just going to return false so the screen wont rotate so the last thing we need to do is just head up and set our month label so were just going to call our calendar helper and get our nicely formatted month string plus a little bit of space and then get our nicely formatted year string given our selected date and then were just going to say collection view reload data cool and heading back into the storyboard theres one thing i forgot to do which was actually set our padding and weve already set our padding to two if you can remember right at the start of the video but we didnt do it here in the storyboard so min spacing to two for lines and for cells and if we go and run this you can see weve got a pretty sweet looking calendar view in swift and xcode you can scroll through and all of the dates should be filling in correctly but yeah thats a pretty basic calendar i feel like i could continue on with this project if anybodys interested maybe we could do something with selected date like put in an event or something along that line so yeah if you want me to continue on with this tutorial leave a comment below with some suggestions and maybe ill have to make a follow-up video for this one but otherwise yeah if you liked the video give it a like and ill catch you guys in the next tutorial cheers you
Code With Cal: Calendar App Example Swift Xcode Tutorial - Mobile App Development