
In Video production
The Absolute BEST iPhone Video Settings | feat. iPhone12 (Pro) - read the full article about video creation tips 2021, Video production and In motion from MountMedia on Qualified.One

Youtube Blogger
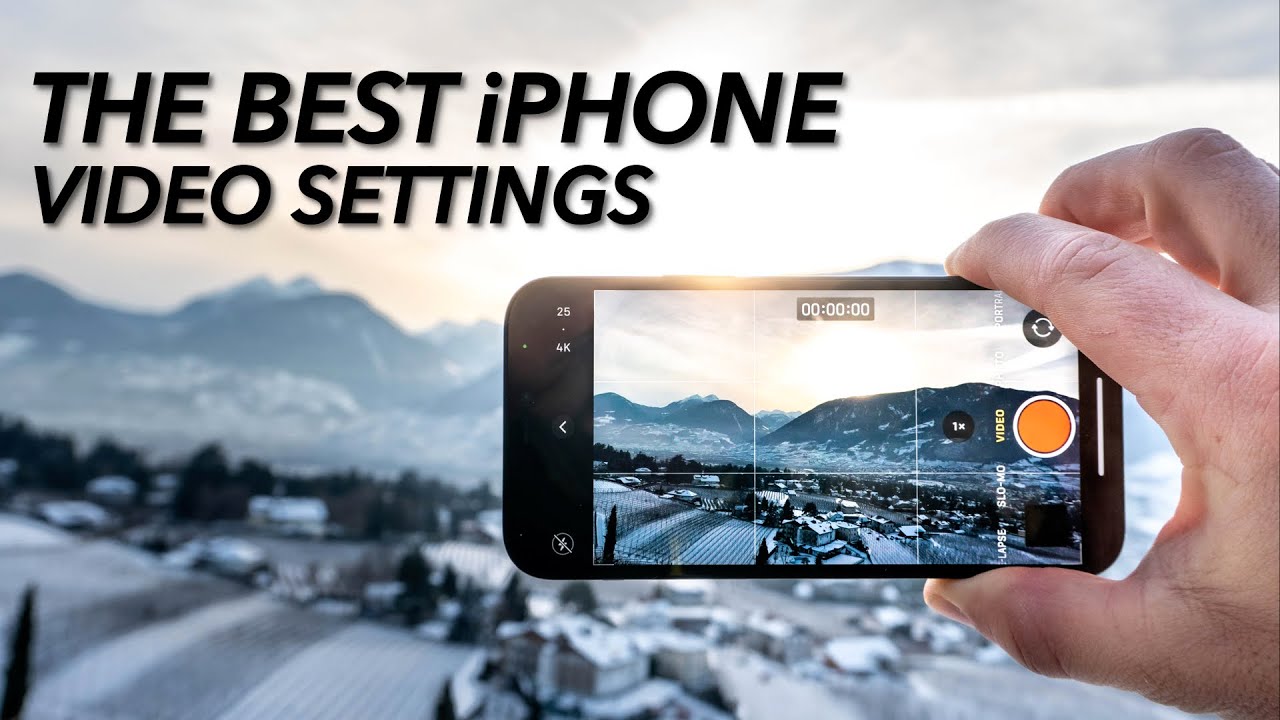
The iPhone is a great device for capturing video. If you want to know how to get the best possible video quality with your iPhone and what settings are hidden behind this seemingly simple interface, then take a few minutes to watch this video. Ill be focusing exclusively on the video features of the iPhones camera app today, and wont be covering any additional apps. When used properly, you can definitely get great results with the camera app. Basically, you can say that the iPhone has three different video modes: video, slo-mo and time-lapse. Video is of course the standard mode for capturing video clips, with Slo-Mo you can take slow-motion shots and with Time-Lapse your iPhone takes images at certain intervals and then merges them into a video clip. In this way, a kind of accelerated clip is created. First, lets take a look at the interface in standard video mode and what settings it offers. It is important that you master all the different features of the app so that you can make the right decisions at the right moment. Lets start with the different functions of the shutter button. Its clear that if you tap the shutter button briefly, you can start and stop shooting a video. But if you tap and hold the shutter button, the recording will only last until you lift your finger. This is ideal if you want to take a short clip. If you change your mind during the recording and want to capture a longer video, simply drag the shutter button onto the lock on the right. The white button on the right lets you take photos during your recording. By the way, the two volume buttons have the same functionality as the shutter button.
The white lines represent the grid. They are supposed to help you compose your shot. In filmmaking, just as in photography, using the Rule of Thirds often leads to more interesting results. So, depending on the situation, your subject should not be placed exactly in the center, but rather on the left or right line. You can disable the grid in the settings if you want. Above the modes menu you can see a 1x. This means that your iPhone is currently using the main camera. The main camera of the iPhone 12 has a focal length of 26mm and a maximum aperture of 1.6. If you tap on the 1x, a 0.5x appears. Your iPhone now uses the ultra-wide lens. The ultra-wide lens has a focal length of 13mm and a maximum aperture of 2.4, so it lets in much less light. If you are using an iPhone 12 Pro or 12Pro Max, you can also switch to the telephoto lens by tapping again. A 2 or 2.5x will then appear. If you tap and hold the number, a wheel appears with which you can zoom in and out more precisely. On the iPhone 12, a maximum of three times zoom is available in video mode. You should now give some thought to the image quality here. The main camera zooms in digitally at every value above 1. This leads to a clear decrease in image quality. Any value between 0.5 and 1 will probably be digitally zoomed in on the ultra-wide lens. This will also lead to a decrease in image quality. For an optimal image quality, you should therefore stick to the focal lengths of the cameras, that is 1x or 0.5x and 2x or 2.5x on the iPhone Pro or Pro Max. For any framing in between or above, you should rather use your legs. It is clear that you can also use two fingers for zooming. In this case, the number of the respective zoom factor changes constantly.
When choosing the lens for your shot, there is something else you should consider. As already mentioned, the lenses or rather the cameras of your iPhone have different apertures. The main lens has a much larger aperture. This allows more light to reach the sensor. For this reason, you should use the main lens in low-light conditions to get the best results. I also noticed that when shooting with the ultra-wide lens, there can be image noise even if the lighting conditions are good, for example if there are large dark areas around the edges.
Apparently, the iPhone tries to brighten up these areas - this results in unsightly artifacts and a partly mushy image. This does not happen with the main camera. Furthermore, the ultra-wide lens still shows some strong distortions despite corrections. The outer areas on the left and right of the image look as if they are stretched apart. On the other hand, the ultra-wide lens has clear advantages when it comes to image stabilization. Although only the main camera has optical image stabilization, the camera shakes are much less noticeable with the ultra-wide lens. This is basically normal - the wider the focal length, the less you will notice camera shakes in general. Therefore, if you move around with the camera and need a well-stabilized image, you should rather use the ultra-wide lens. As you can see, when it comes to getting the best image quality, there is also a lot to consider when choosing the lens.
Correct exposure and focus are also crucial for the best possible image quality. Especially when you use the main camera or even the telephoto lens, certain parts of the image may be in focus and others not. This is especially the case when there are objects in the near foreground. Your iPhone will generally focus automatically, and it does this very well. However, you may not be happy with the autofocus and want to adjust it manually. You can do that easily by tapping on the object you want to be in focus. The exposure will then also adjust to the new focus area. However, if you move the camera afterwards, the focus and exposure will change again automatically. Especially when shooting videos, however, you may want to do certain camera movements and do not want the focus and exposure to change automatically. You can lock the focus and exposure by tapping and holding on the object you want to have in focus. The AE/AF Lock icon will appear at the top of the screen. The exposure and focus will now not change even if you move the iPhone. If youre still not happy with the exposure, you can adjust it using the sun icon next to the yellow square. If you swipe the sun up, the image will get brighter, if you swipe it down, it will get darker. This works when focus and exposure are locked as well as when the automatic is active. However, when a new focus point is set, your adjustments are cancelled. When shooting video, though, you may want to constantly overexpose or underexpose your image a bit, regardless of whether the focus changes or not. Remember that proper exposure is more important when shooting video than when shooting stills. Especially because video files dont contain as much information as individual photos and therefore cant be edited as well. If you swipe your finger slightly upwards, two new icons appear. On the left there is the flash and on the right the symbol for the exposure compensation control. If you tap on it, a slider opens with which you can adjust the exposure. If you adjust the exposure this way, the negative or positive value will be kept and all further shots will be underexposed or overexposed. But why would you deviate from the automatic at all. The fact is that the iPhones automatic exposure works incredibly well and highlights, that is, very bright areas in the image, are also very well protected by the extremely high dynamic range, even in difficult situations. There are hardly any overexposed areas in the image. Exposure control on the iPhone is therefore less about preventing burned out highlights and more about creative control. So what mood do you want to convey and should therefore the image rather be a little brighter or darker. By clicking the flash icon on the left side you can also activate the flash for video recordings. Yes, this can sometimes be necessary and useful, but dont expect excellent results. At the very top of the screen, on the left, youll find the icons of the features that are currently active, such as the flash or the Exposure Compensation Control. If you tap on the flash, you can deactivate it here as well. More important are the two settings in the upper right corner, the resolution and the frame rate. As far as the resolution is concerned, you have the choice between HD, that is 1080, and 4K. Since today, as I said, were talking about how to get the best possible image quality from your iPhone, you should choose 4K here. This leads to a few advantages and disadvantages. The image has a much higher resolution than an HD image. It therefore looks much better, especially on larger screens. You can also crop and adjust the framing in post, without causing a sharp drop in image quality. The downside of 4K is clear - the higher resolution requires significantly more storage space. Also, older computers sometimes have trouble processing the footage. On the right you can set the frame rate. In 4K you can choose between 24, 30 and 60 frames per second. Generally, the more frames per second, the smoother and perhaps more natural your footage will look. However, professional movies are generally shot at 24 frames per second. Our eyes have long since become accustomed to this low frame rate. Therefore, a video shot at 24 frames per second looks much more cinematic than one shot at 30 or 60 frames per second. A high frame rate therefore looks smoother, but not as cinematic. For this reason, I personally prefer a frame rate of 24. Your frame rate should also generally match the frame rate of your project. So if you want to create a video project with 24 frames per second, you should also capture your footage with 24 frames per second. You should only deviate from this if you want to create slow motion footage. And that might be a reason to shoot at 60 frames per second. You can slow it down to 40% in Post and get some really cool slow-motion shots in 4K. If, on the other hand, you dont need slow motion, Id avoid 4K/60. For a couple of reasons: the high frame rate requires even more storage space. Your iPhone also tries to occupy as little memory as possible for your video recordings. For this reason, the footage is compressed as much as possible. Unfortunately, this leads to so-called compression artifacts in certain situations. These can significantly reduce the image quality. Such compression artifacts occur much more frequently and more strongly at 4K/60 than at lower frame rates. And there is another situation where you should do without high frame rates and that is in low light. In low light, low frame rates are advantageous because there is more time to let light in. You will therefore get better results in these situations with 24 frames per second.
Before we take a look at the video settings of the camera app, a few words about the Slo-Mo and TimeLapse modes.
In Slo-Mo mode, as the name suggests, you can capture slow motion clips. For this, your iPhone shoots a video with 120 or 240 frames per second. At the moment, this is only possible in HD. Basically, you should only use this mode when you really need it. The reduced resolution and the high number of frames per second lead to a significant decrease in image quality. Sometimes it is fun to capture such a slow motion video and when there is a lot of action it can lead to interesting results. I recommend you to get as close as possible to the action in such cases. Your subject should be shown as big as possible. This way you can best conceal the poor image quality.
The time-lapse mode is also an interesting feature. You can use it to convey the passage of time very well and, for example, enhance your travel videos. Unfortunately, there are no settings that you could adjust. The only thing I would like to add here is that you can also move around with the iPhone in good lighting conditions. Hold it steady and at a constant height and move towards or around an object in predefined lines, for example. The iPhone will stabilize the image afterwards and interesting hyperlapses will result. In low light conditions, however, you should use the iPhone on a tripod. If youre interested to know what suitable tripods are available and what my favorite iPhone accessories are for filmmaking, check out the links in the video description.
Now lets take a look at the video settings in the settings of the Camera App. Here you can find some very important settings to adjust. First, lets take a look at the format. Here you can choose between High Efficiency and Most Compatible. If you choose High Efficiency, your iPhone will capture videos using the HEVC codec. This codec can compress the video files much more. This means that the file sizes will be smaller, and I mean significantly smaller. Some older devices have problems with this codec. The important question now is whether the choice will also affect the image quality. With previous iPhones, the High Efficiency Mode sometimes led to worse results. According to Apple, there is no loss of image quality. I compared a couple of shots and as you can see, there is hardly any difference between the HEVC shot and the shot taken with most compatible, that is, the older codec. In fact, I would say that the High Efficiency recording shows a little less noise in the dark areas of the image. Basically, I would recommend you to use the High Efficiency Mode. This is necessary anyway if you want to shoot in 4K/60, 1080/240 or if you want to shoot videos in HDR. And that brings us to the next important topic: HDR and the question of whether you should capture your videos in HDR and Dolby Vision, what became possible with the iPhone 12. You can turn the HDR mode on and off in the Record Video menu.
I have already made a very detailed tutorial on this topic. Today I would like to explain the subject HDR only roughly simplified. With HDR, your iPhone can capture and display video clips that have much higher brightness values than a normal video clip. This means that the very bright areas in the image, for example light sources can be displayed much brighter than with a normal recording. The difference is huge. It makes the shot look much more realistic and natural. It has much more contrast because the difference between very dark, so black, and very bright is much greater. Also, your iPhone uses 10-bit color depth for HDR shots. So there are much more shades between a dark and a bright color. All of this, of course, allows you to get a much better image quality. However, there is a crucial catch: you need an HDR screen to display the shots correctly and with these special characteristics. In addition, you also need to create an HDR project in video editing and should of course also use an HDR monitor for this. Of course, the iPhone itself has an HDR and Dolby Vision capable screen. Therefore, HDR videos look much better on the iPhone than non-HDR videos. However, when you transfer your videos to the computer to watch them on your monitor or to use them as part of a larger project, its a different story. The footage will be adjusted when played back, and its hard to tell the difference to a non-HDR-Clip. HDR shots will look a bit brighter and may have a little less contrast, which of course you can easily fix in editing. As I said, the subject is complex, so if youre interested, check out my respective video. Today, to summarize, Id like to say that you should definitely use HDR if you mainly watch your videos on your iPhone. If, on the other hand, youre shooting your videos to create a larger project on your computer, then theres no advantage to shooting the video in HDR. However, theres also very little downside to capturing your videos in HDR. Lets take a look at the other settings in the Record Video menu. Right at the beginning, you can set your default frame rate at which the video mode will start. If you live in the PAL region, which would be most states outside the US, you can enable the PAL frame rates here. That would be 25 frames per second instead of 24. This will help reduce flickering issues when shooting video in artificial light. As I said before, low frame rates like 24 or 25 frames per second are advantageous in low light conditions. Your iPhone has a feature called Auto FPS that will automatically reduce a higher frame rate of 30 or 60 fps to 24 fps in low light conditions. Here you can specify whether the feature should only be active at 30 or also at 60 fps. Personally, this hardly matters to me, since as I said, I mostly use 24fps. If you also want to be sure that the video is always recorded at the frame rate you set, you should disable the feature. If you enable Lock Camera, it will no longer be possible to switch between cameras or lenses while recording. You can only zoom digitally. This can be useful because, as mentioned, the different cameras have different characteristics. The ultra-wide lens also leads to distortions. So it can look weird when you switch back and forth in the same clip. Lets briefly summarize the main points of this tutorial in a few tips: Take a close look at the interface and features of the Camera app to get the best possible results in each situation. When choosing the camera or lens, keep in mind that the ultra-wide lens and also the telephoto lens definitely have some disadvantages compared to the main camera. Also, do not use digital zooming Use 4K and 24 frames per second for a cinematic look. 30 frames per second if you prefer a smoother look. I would only use a higher frame rate for slow motion. Use the High Efficiency Mode. You will save a lot of storage space Capture your videos in HDR if youll be watching them primarily on your smartphone. If you are shooting them for a larger non-HDR project, you can also disable HDR. And thats it for today. If the video was interesting for you give me a Like as feedback. If you want to support this channel you can use the link in the video description and buy me a coffee. There will be more iPhone tutorials to come. So stay tuned and see you next time!
MountMedia: The Absolute BEST iPhone Video Settings | feat. iPhone12 (Pro) - Video production